Hello!
Today I am finally getting around to posting this project that I have been putting off for quite a while. When we moved into our home, the bathroom mirror was just a basic slab of mirror hung on the wall. It’s nice because it’s very big, but it’s very boring. So, I decided to put some sleeping diy skills to the mirror to give our bathroom a fresh look!
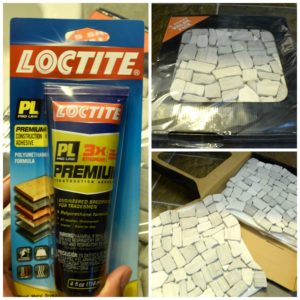
I have been searching for great tiles to use for a few months now. I didn’t want to spend a lot, so I was mostly browsing the clearance tiles. So, I’m at Home Depot about a week ago and see a display that had these amazing stone times and the sale sign said $4.99 per sheet…I read it as “buy as many or as few sheets as you need.” Well I was wrong. The sheets were $4.99 but you had to buy the whole box, making it $24.99. But lucky day for me…my charm and personality must have swayed the sales kid, because he whipped out this handy little card and scanned it and said “give this at check out and the box will ring up at $4.99.” WOOHOO! My tiles and the glue I used came to about $11 total. Huge savings!
mirror project supplies
The Loctite glue seems to be the strongest I could find. It says it holds to glass and stone…so far it seems very strong.
I measured my mirror and lined up my stones on the floor in a unique pattern
![DSC_0115[1]](http://andsheloved.com/wp-content/uploads/2016/05/DSC_01151-e1463583863804-200x300.jpg)
I had to hold pressure on each stone for 20-30 seconds before I taped it down just to make sure it didn’t slide down the glass.
![DSC_0118[2]](http://andsheloved.com/wp-content/uploads/2016/05/DSC_01182-e1463584030831-300x200.jpg)
This is what all the tape looks like…I let it sit 24 hours per the glue directions before I removed the tape.
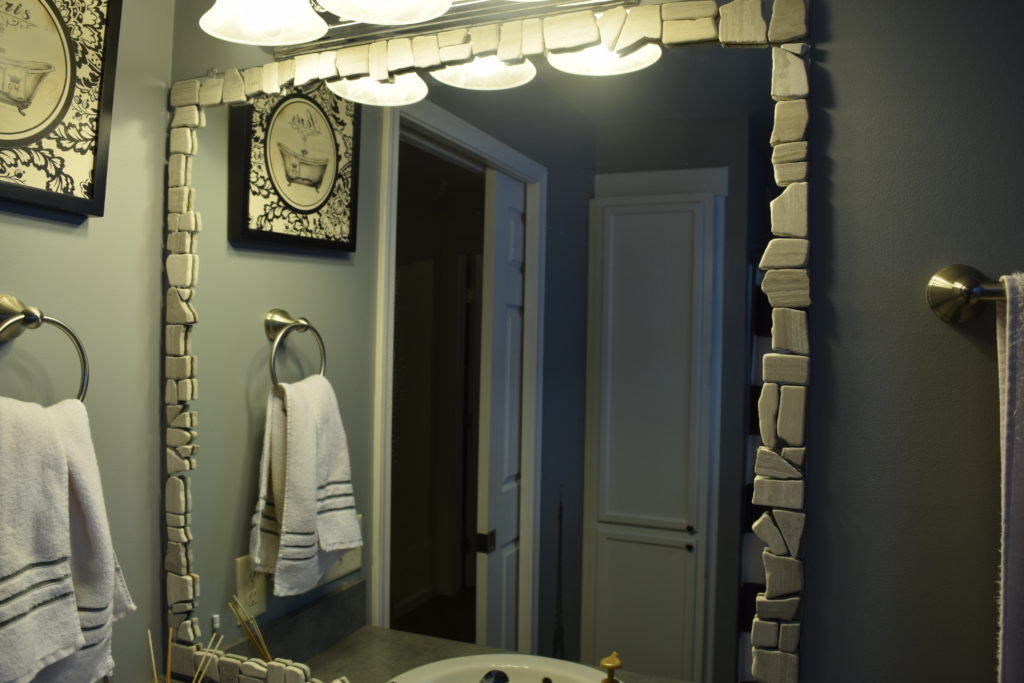
and voila! My finished refurbished mirror!
![DSC_0119[1]](http://andsheloved.com/wp-content/uploads/2016/05/DSC_01191-300x200.jpg)
![DSC_0121[1]](http://andsheloved.com/wp-content/uploads/2016/05/DSC_01211-e1463584214816-300x200.jpg)
I am very happy with these results! Easy, cheap fix for a slab of glass to add something fresh to a bathroom! This project is great because it is customizable (is customizable a word? I don’t think so) according to your own room’s colors and styles. Have fun and happy diy’ing!
